
GETTING STARTED
My beginners guide to Sourdough…SAVE IT! and don’t forget to follow my journey on insta @thefigure_
Why…because I started making sourdough exactly 23 days ago and apparently you all love this content so much – I’m basically a baker now.
Adios – nutrition and fitness coach – you’ve been grand….
Ok kidding – but my stories blow up every time I put my perfectly baked loaves up and the questions came pouring in about how I’m doing it. So I’m taking it. I’m a pro now. Just ask me.
EDIT: So it’s the 12th April now and I started my journey on the 2nd January 2024. It’s been going so well however I’ve not been 100% happy with the density of my bakes so last week I decided to try someone else method so below my recipe is an updated one which is working so well – it’s light and fluffy. It is a higher hydration which takes a bit of getting used to – so just ensure you have wet hands.
Making our own sourdough was one of my 2024 goals. Why?
As my journey progresses each year to reduce ultra processed food this was the next step, we also go through a shit tonne of bread and that stuff can get expensive so 2 birds – 1 stone. Sourdough has so many benefits including being low GI which means long lasting energy without the slumps, the fermentation process means it is great for our gut microbiome – to promote health guts which in turn promotes positive mental health. It doesn’t have all the additive and preservatives that store bought bread has, and we know that ultra processed food is the main cause of chronic disease and poor mental health. It also promotes a sense of pride and accomplishment. Nothing better than eating bread you’ve baked from scratch, seeing your loved ones enjoy it, or gifting it to friends. All of this also helps increase your happy hormones promoting positive mental health. I’m all about whole foods and you can find more of my recipes in my recipe book Yummy – it’s all about balance.
I was nervous and overwhelmed at the start because in my head it was a long and tedious process. But once I realised that the actual hands on time was less than 30 mins- I was committed.
What you’ll need
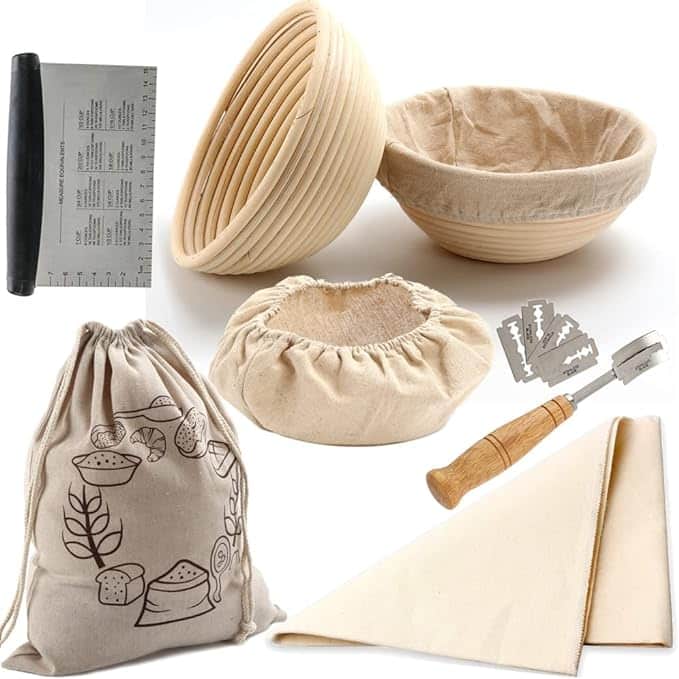
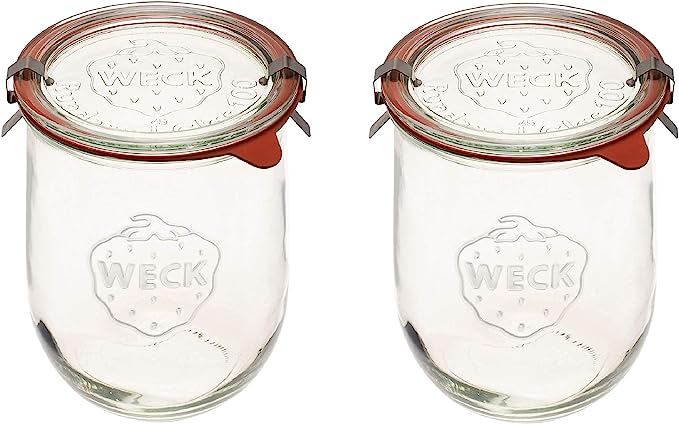
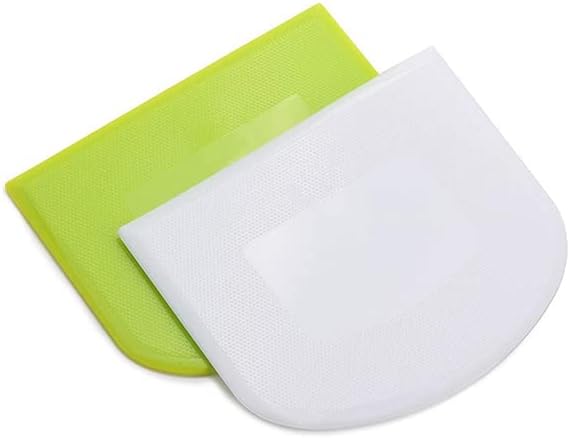
I kind of winged this at the start. I didn’t want to spend $90 at the start if this was going to be a total flop so I started with the starter kit (image 1). Which was $39. I know I needed a banneton or 2, a scorer, and. I thought the bag and scraper would be a good addition. Turns out I don’t use that scraper – and what I needed was these soft scrapers (image 3) which are bendy. I also didn’t need the calico cover (because I have a million tea towels at home that do the same thing) so next time I would just get the bannetons, bag and scorer. The jars I was using for my starter were old jars from veggies and jams which I’d cleaned and had in the cupboard. They were fine -but I wanted to get fancy – so got these Weck jars – and the lid can be just popped on without being sealed which is perfect for a starter.
I got all of this from Amazon and next day delivery which was fab.
The first set with the bannetons, scorer and scraper you can get. HERE
The Wex Jars you can get HERE
The scrapers you can get HERE
You want to use a flour that has a high protein – 11-13% is great. If you’re in Australia, Coles sell one called Wallaby bread flour and that’s what I’m using. You can get some gorgeous organic flours from health food stores, and different types like rye, but the cost is higher. Wallaby is usually $14 for 5kg which works out at $1.40 a loaf (sometimes on sale for $9 too). The organic ones I’ve found are $14/kg which works out at $7 a loaf.
You”l need a nice large bowl, some salt and some tepid/room temperature water. That’s it. I’ve popped different flavours below too if you want to experiment.
Research
My first 3 loaves were total flops. Everyone’s cooking environments are different so depending on the temperature of your kitchen might mean some recipes and methods work better. So I tried a few different recipes and methods until I found the one that’s working for me. It’s the winner. I tried one where you do your stretch and folds every half and hour then bulk ferment on your bench fora longer period – this also didn’t work for me time wise. With daycare drop offs and work calls, I couldn’t commit to every half and hour. That’s the other thing – you can make it work for you. I also find – on hotter days I don’t need to leave it for so long as it rises quicker.
I also experimented with different shapes. So far the oval is the simplest, however I popped it in a loaf tin one day to see what happened and that was great for sandwiches and the kids. More surface area, less crust. I’ve added in Jalapeño and Cheese, we’ve done fruit and cinnamon, the possibilities are endless when it comes to flavours. I’ve even made crumpets and granola with the discard starter too. More on that another day.
So happy baking! I have YouTube that many videos and googled that many things to get to here – and my journey is just beginning
Make sure you tag me once you’ve nailed it too!!
Starter and Recipe
I was given a starter by a gorgeous friend Lutzia. Which meant I could get started straight away. Starter recipes are pretty simple too if you don’t have a friend like me to gift you one. @shebakessourdough has an epic one to follow which is simple and also a tonne of recipes and info too. You really want to make sure it’s doubled and bubbly when you look at it. I left one too long once and it had risen and flopped back down meaning my bread didn’t rise very well.
Recipe
- 100g starter
- 360-385g tepid water depending on your environment and comfort level
- 430g high protein bread flour
- 70g high protein whole wheat flour
- 10g salt

Method
In a large bowl. Pour in the water and flour and mix well. Until there’s no floury bits left. Then add your starter and combine well. I use my hands to fold it in – make sure they’re wet.
Cover and leave for 30 mins. This is called the autolayse. It basically means leaving the flour and water to fully hydrate at rest.
Add the salt and ensure its well distributed throughout, this may take about 3 minutes with your hands, then cover and leave for another 30 minutes.
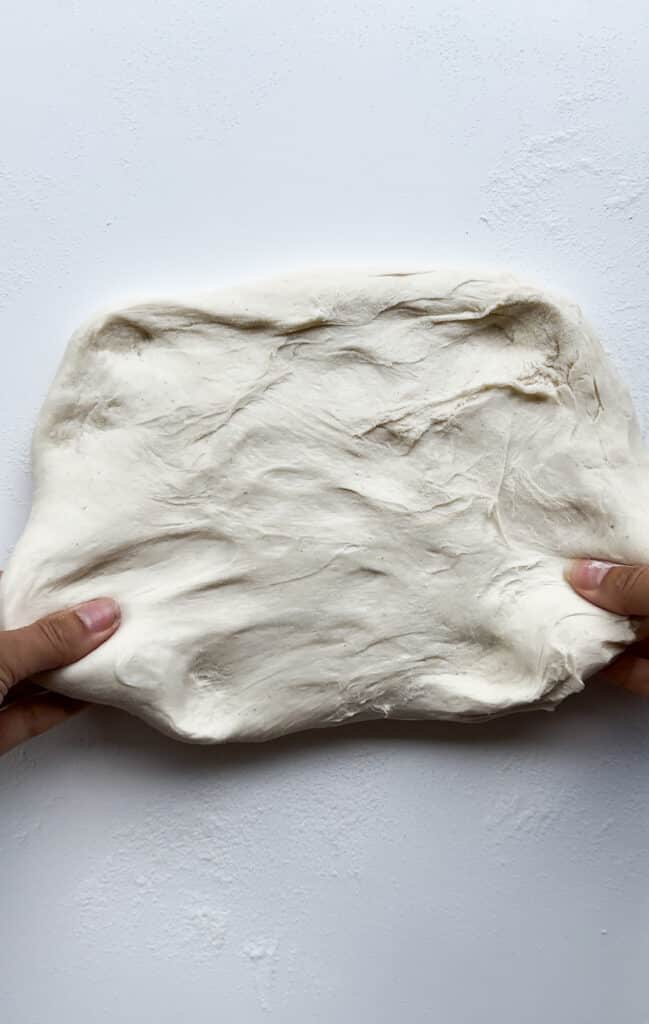
Wet your hands and do your first set of stretch and folds. Pulling a side of the dough out and folding back in, working your way around the dough in a circle until you’ve folded all sides in. Cover and leave for 30-45 minutes.
Do you first set of coil folds. You’ll do 4 of these. Lifting the dough up from underneath and letting it hang down. Placing it back in the bowl and repeat 2-3 times. Cover and rest for 30-45 minutes.
Do this 3 more times 30-45 minutes apart.
Pre shape and Shape
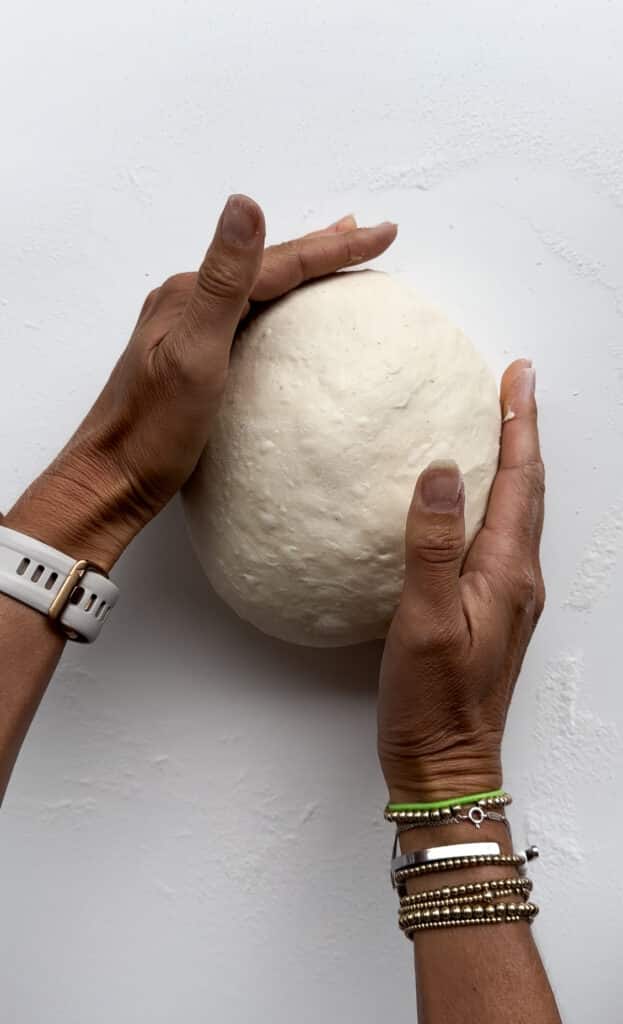
Pre shape. Sprinkle rice flour on the bench, push it out into a rectangle, folding each side over then turn it around and do 3-4 rolls to make it nice and tight. Make it into a ball and bench rest covered for 1-4 hours – you want it to almost double in size.
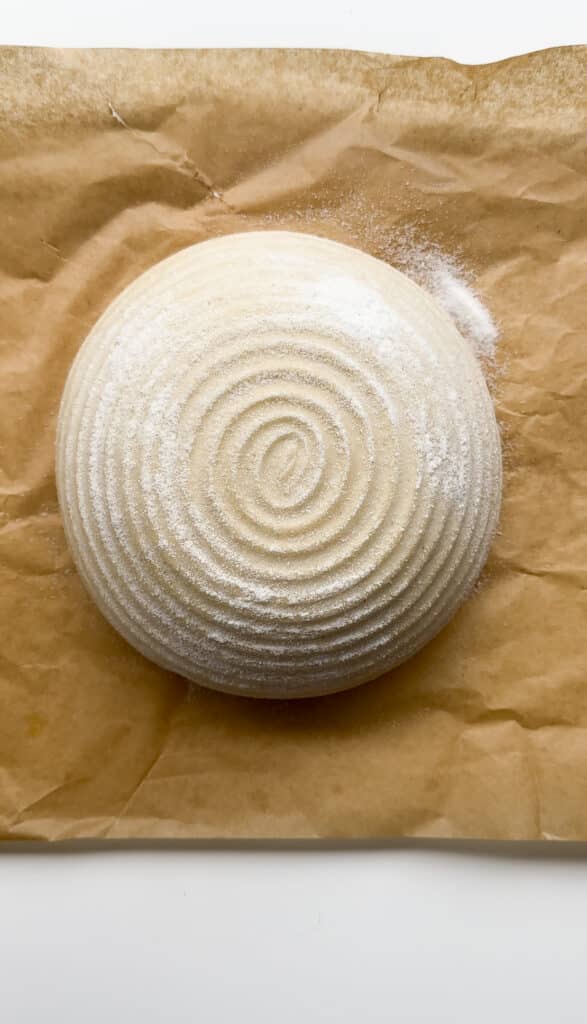
Shape. On rice flour turn the dough over so the sticky side is up and repeat the step above making in to a nice tight ball. Into a banneton seam side up.
Cover and refrigerate overnight. (Minimum of 4 hours)
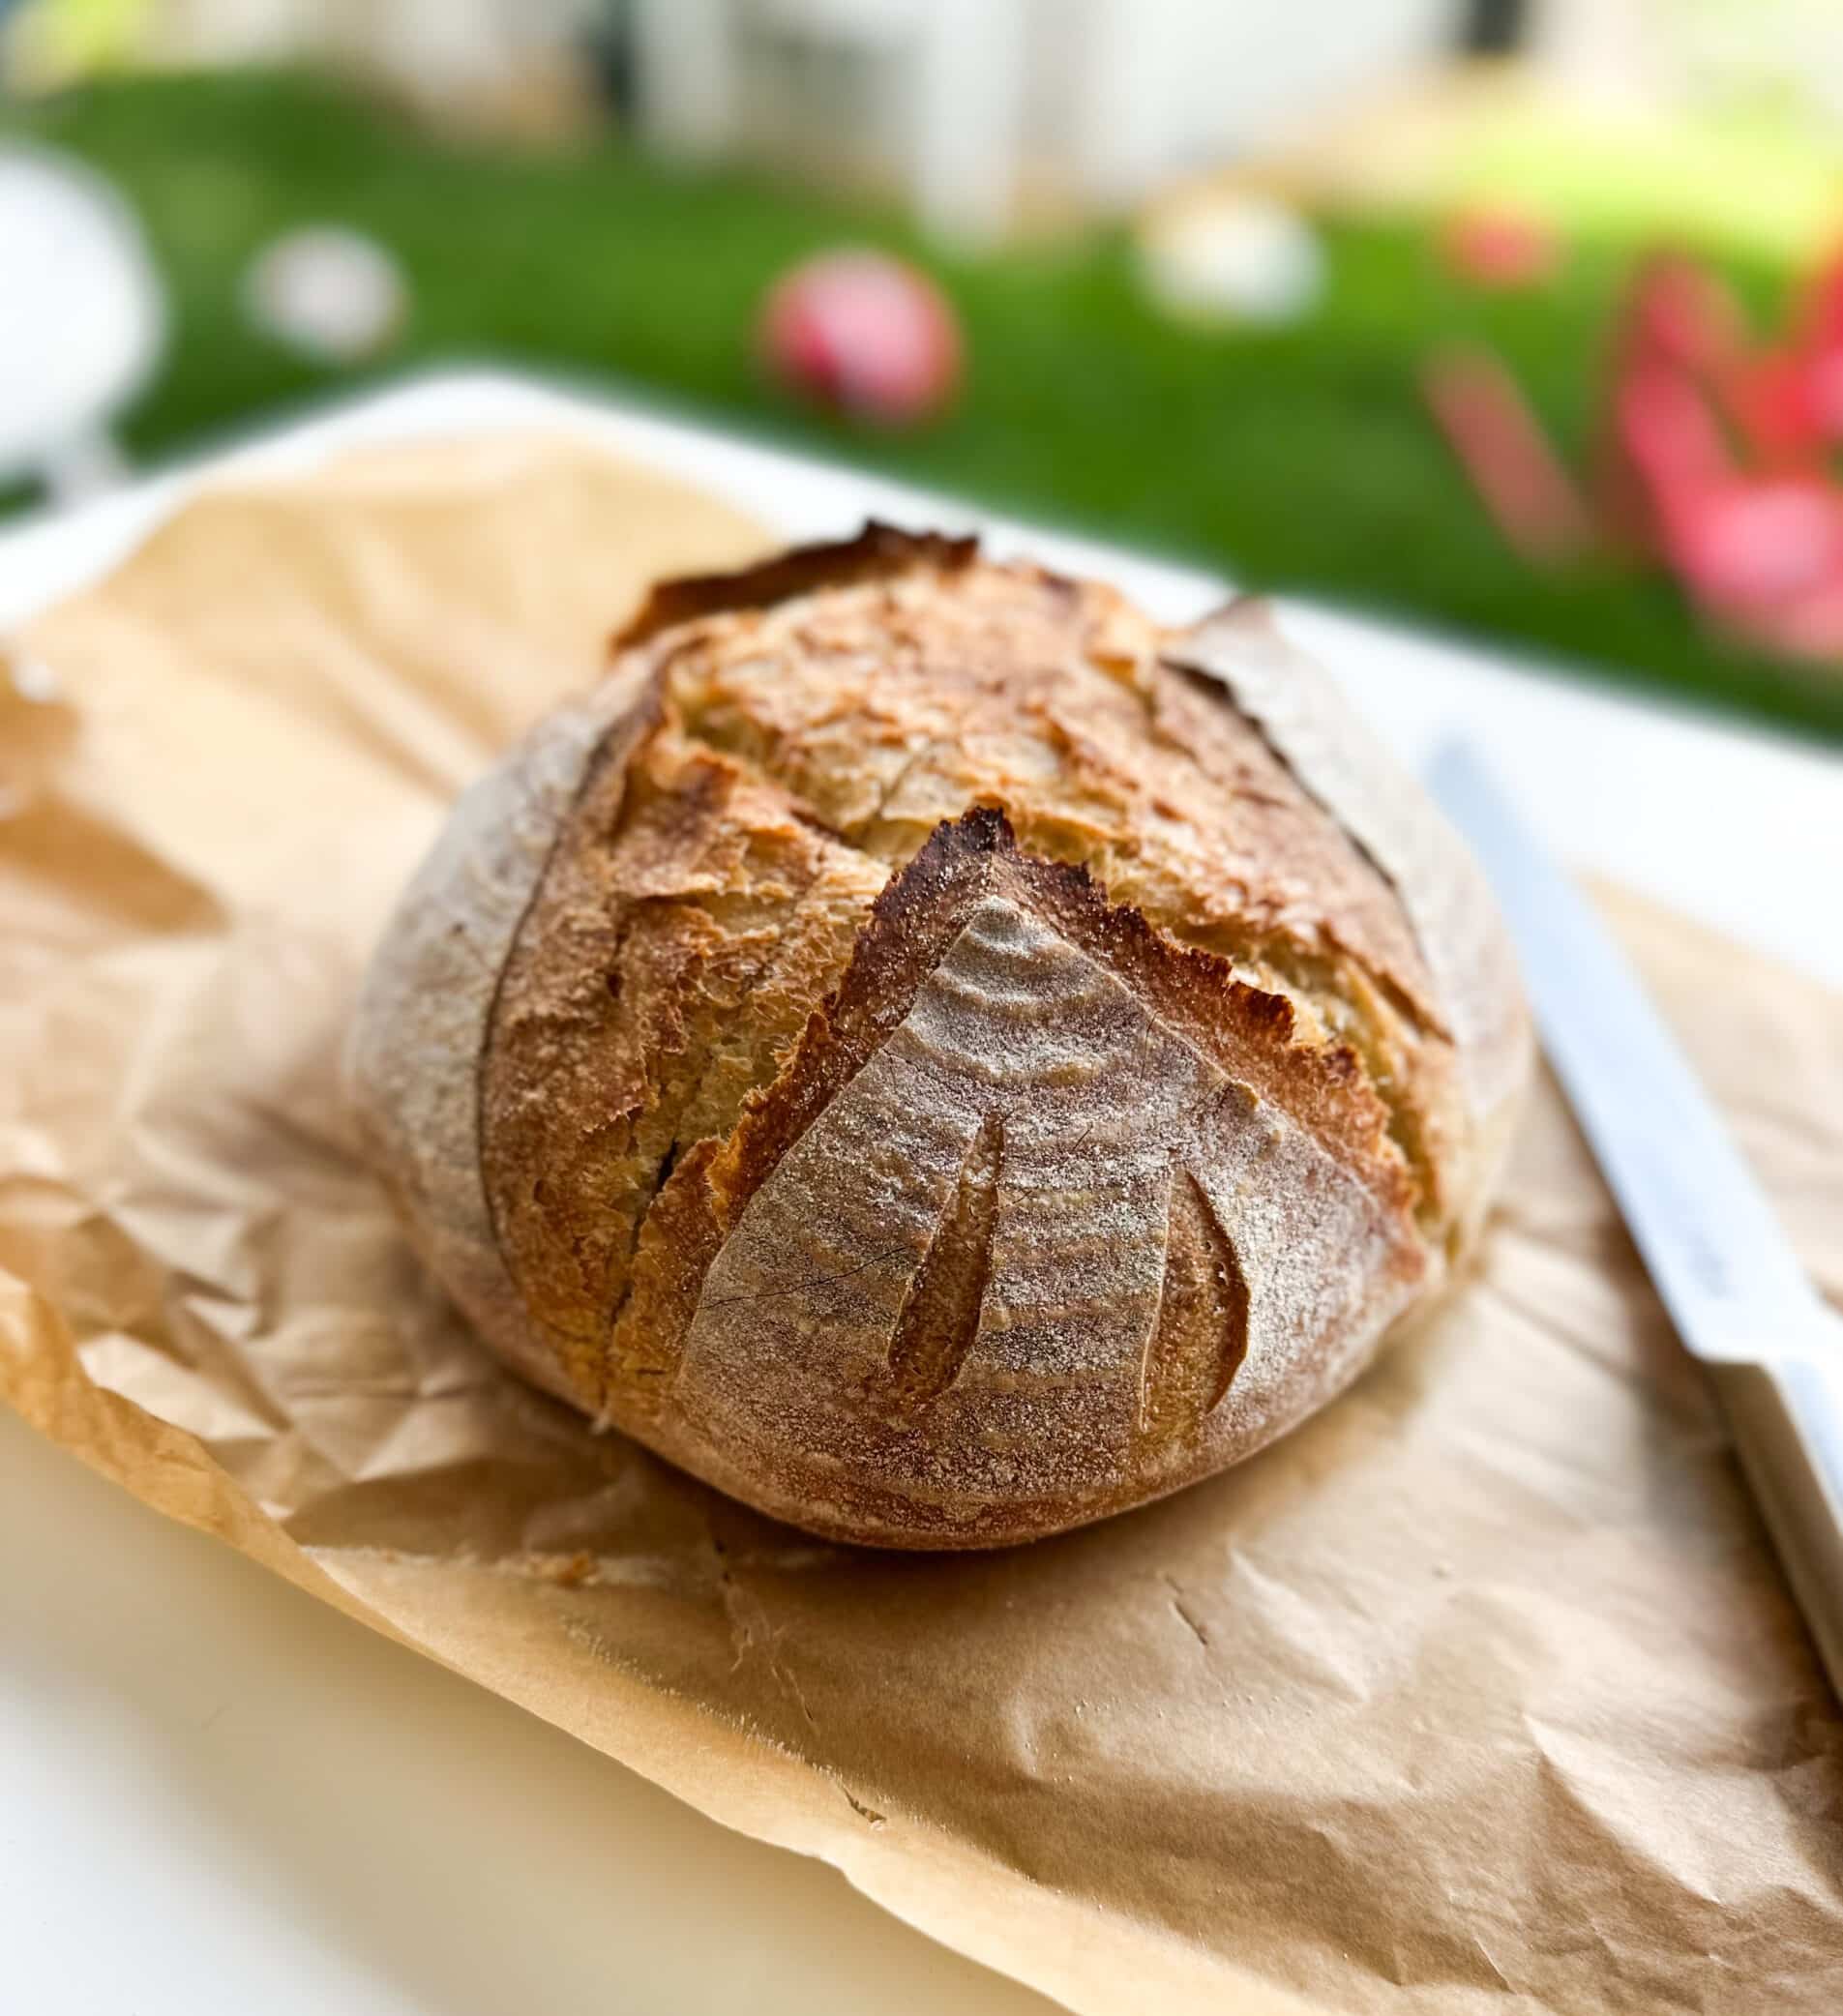
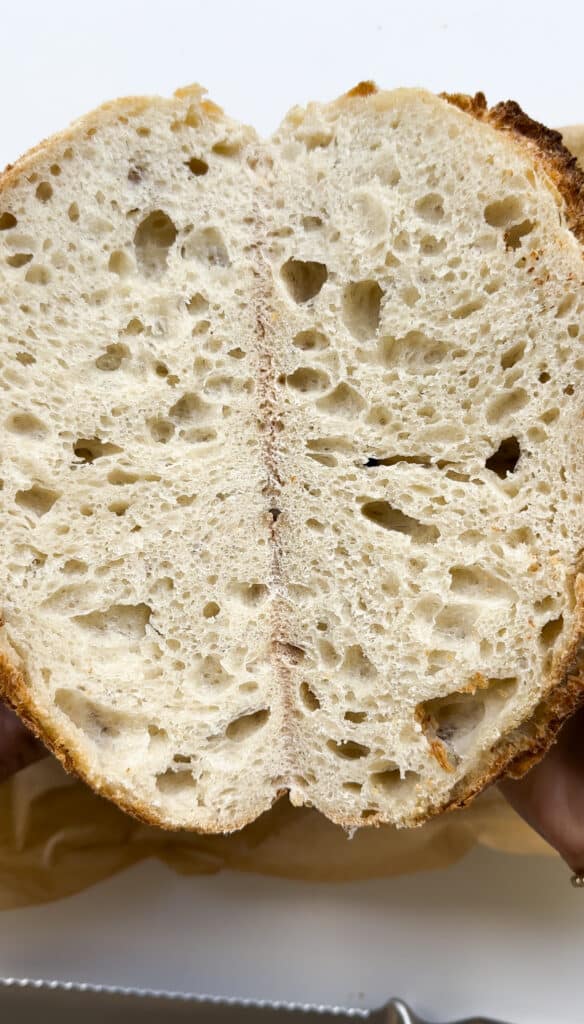
Pre heat your oven with the crockpot/dutch oven inside to 250 degrees for half and hour. Turn out your dough on baking paper, sprinkle some rice flour and score. Place it in the dutch oven with the lid on for 30 minutes. Then remove the lid turning down to 220 degrees for another 10 minutes or until nicely browned.
Leave to fully cool for around 3-4 hours before slicing.
I bought myself an epic knife because cutting it was so hard. You can grab the same knife. HERE
You may stuff it up the first few times – but never fear just keep going.
Starter maintenance
Maintaining your starter. I have a “mother” starter in the fridge which I feed once a week. 20g flour and 20g water. Discarding a little each time before each feed. Then I have my working starter on the bench. If you’re not baking every day, you may want to pop it in the fridge and only feed it every few days (take it out and feed it the night before you make a loaf). At the moment I’m baking every day so my working starter stays on the bench and each night I feed it 50g flour and 50g water. If I’m making a loaf early the morning and want to make one in the afternoon – I’ll just feed it again and wait 4-6 hours before making another.
We went away for a week and I just popped it in the fridge and fed it after a week. If I was going away for longer I would probably have to ask someone to feed it.
Discard
If you’re not making a loaf – you will need to remove 80% of your starter before you feed it each time. DO NOT THROW IT AWAY. You can use sourdough discard for so many delicious recipes including crumpets, crackers, pizza bases, granola, banana bread and so much more. More on this another time but KEEP IT. Just keep topping it up in another jar and keep it in the fridge.
Happy Baking
So off you go – and don’t forget to follow me on instagram @thefigure_ and tag me when you’ve nailed it. I love seeing you guys create my recipes and feel proud and accomplished too.
